

How To Set Up 1and1 Webmail On Android
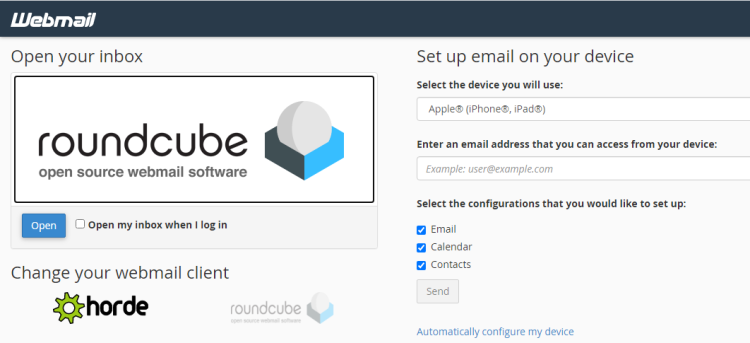
Popular Webmail services such as Roundcube, SquirrelMail, and Horde allow you to admission and use the custom @yourdomain.com email address connected to your website.
To avoid missing priority emails, you can set up up email forwarders to ship a copy of each incoming postal service to a pre-ready e-mail address, or you can link your webmail client to your Gmail account.
In this article, yous volition learn how to configure your webmail client on Android via Gmail, but earlier that, let'south meet webmail.
What is Webmail?
Webmail is short for spider web-based email, any e-mail service that you lot can access via a web browser.
In that location are dissimilar types of webmail clients you can choose from. Some of the pop examples of webmail providers include AOL Mail, Gmail, GMX Mail, Icewarp Mail Server, Mailfence, Outlook and Hotmail, and Yahoo Mail.
Net Service Providers and web hosting companies likewise provide webmail services. For this article, we will be focusing on how to set upward webmail on Android via Gmail.
What Protocol to Use, POP3 or IMAP?
To configure your Android phone to admission webmail via Gmail, you will need to choose either POP3 or IMAP. They each allow y'all to access your emails on one or multiple devices or locations.
POP3
POP3 stands for Post Role Protocol version 3, an cyberspace standard protocol used by email clients to receive letters from a remote mail server to a local mail client. POP3 downloads your emails to your local figurer and allows you to admission emails offline.
POP3 does non coordinate with the server. This ways that the letters yous read, delete, or respond to will non testify up every bit such in your webmail client and in Gmail. In other words, if you read, delete, or answer to a message in your webmail client, your Gmail will still be showing all messages as unread.
IMAP
IMAP stands for Internet Message Access Protocol, an net standard protocol that email clients employ to remember email letters from a mail server over a TCP/IP connection.
IMAP email access coordinates between the server and your mail application. In plain English, information technology ways that the messages you read, delete, or answer to will show up equally such, both in your webmail client and in Gmail. This provides a synced experience.
Outgoing postal service is sent using SMTP. SMTP stands for Uncomplicated Postal service Transfer Protocol, it is the standard protocol used to send mails across the cyberspace. IMAP, POP3, and SMTP all require authentication.
Roundcube, Webmail Lite, and SquirrelMail all use the IMAP protocol.
How to Ready Webmail on Your Android Phone
Here is how to configure your Android telephone to be able to admission webmail.
- Open up Gmail on your Android phone.
- Tap on your profile movie, and then select Add another account. You lot may have to scroll downward if you already accept multiple Gmail accounts.
- Nether Ready up email, scroll down and tap Other.
- Under Add your email address, enter your electronic mail accost in the space provided.
- Tap Adjacent.
Most post clients will automatically configure your account.
If automatic configuration fails, tap MANUAL SETUP and input the following port numbers manually when prompted:
- Incoming Server: IMAP Port: 993, POP3 Port: 995
- Outgoing Server: SMTP Port: 465
Configure Your Account
You will be asked, what type of account is this? Select either Personal (POP3) or Personal (IMAP). If you're non sure which to select, log in to your cPanel account and check which protocol your preferred webmail customer works with. Roundcube, SquirrelMail, and Webmail Light all employ IMAP. Or check the support pages of your e-mail provider.
For this setup, we will select IMAP. You shouldn't spend all day trying to determine which email protocol to choose for your incoming server settings. You can ever switch between POP3 and IMAP as your needs change in the futurity.
- Later on selecting your preferred protocol, you lot tin at present input your countersign in the space provided, and so tap the Side by side button.
- On the side by side folio, review your Incoming server settings and tap Next.
- Under Outgoing server settings, tap the toggle button to plough off Require sign-in or leave as is if yous want your mail client to require sign-in each fourth dimension you access your mail.
- Go on and tap NEXT.
Adjust the Account Settings
- Under Account options, tap the downward pointer to select your Sync frequency. It is set to refresh Every fifteen minutes past default. You can accommodate this later if you want.
- Settings like Notify me when emails arrive, Sync email for this business relationship, and Automatically download attachments when connected to Wi-Fi, are your default account settings. You tin can use the checkboxes to modify whatever of these settings.
- Tap Adjacent.
Your account is now created. Yous volition encounter a congratulatory message at the height of the page informing you that your emails are on the mode. In the space provided, enter your name as you want it displayed in outgoing messages, then tap NEXT to finish the setup.
You should receive an electronic mail with your client configuration settings. Relieve this message in example you need to alter your preferred protocol in the future.
Virtually hosting providers recommend using POP3 over SSL/TLS or IMAP over SSL/TLS while setting up your post client on your Android device. This is considering they provide increased security for your interactions with the remote mail server.
Now That You're All Set
By setting up your mail client on your Android phone via Gmail, you will no longer have to go through the extra hurdle of logging into your cPanel dashboard just to access your web-based emails.
As well, you will be able to keep tabs on all your webmail and so that you don't miss important emails. Gmail will sync your emails every xv minutes so you tin catch new letters as they go far. You can accommodate this sync frequency later. At that place are options to sync your accounts every 15 minutes, every 30 minutes, every hour, or manually.
You can echo this process for any number of email accounts you want to set upwards on your Android phone. Simply tap your Gmail profile picture show, go to Add another account, and take it from at that place.
About The Author


How To Set Up 1and1 Webmail On Android,
Source: https://www.makeuseof.com/how-to-configure-webmail-on-android/
Posted by: runyanwhey1952.blogspot.com
0 Response to "How To Set Up 1and1 Webmail On Android"
Post a Comment